Make your localhost available on Public Internet
Using ngrok (local tunnel solution) freemium model


Table of contents
Overview
Every great website, application and that great feature you like the most in your favourite app started from the development environment. More often than not, developers get really anxious and curious when working on project; they want to share their work with people, get feedback, demo product, test responsiveness of designs, make users have a feel of their website or app without actually deploying their product. You might be thinking that this is not an hard nut to crack as a developer can demo the project on their machine and show them to their friends, clients etc but actually it is an hard nut to crack considering some limitations such as distance barrier. Luckily, ngrok was built to solve this problem alongside its limitations. Continue reading to know what ngrok is and how to use.
Ngrok
ngrok exposes local servers behind NATs and firewalls to the public internet over secure tunnels.
ngrok allows you to expose a web server running on your local machine to the internet. Just tell ngrok what port your web server is listening on and then the localhost development server is mapped to an ngrok.io sub-domain, which a remote user can then access from anywhere.
Getting Started with ngrok
NB: I will be using a django project to illustrate this.
- Click here to download ngrok.
NB: If you downloaded the Zip file you need to unzip the file and click onngrok.exe
You should get a terminal/cmd windows that looks similar to this👇
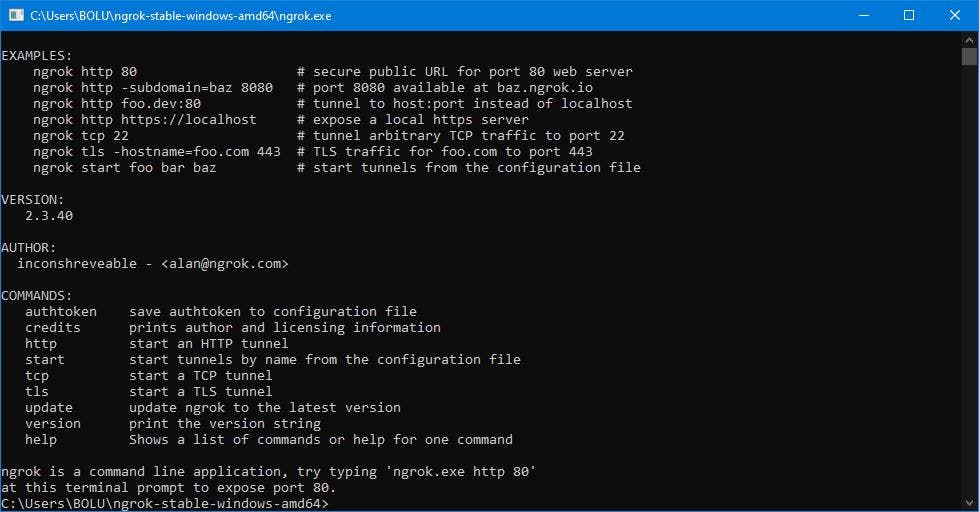 1.
1.ngrok.exe [protocol] [portnumber]: This command exposes a local web server at a particular port number. For example, typing ngrok.exe http 8000 exposes a localhost at port 8000 to a public url provided by ngrok.
NB:Ensure you have started running your localhost server at that port number and included the url in the allowed host of settings.py file of your project.
You should get a terminal/cmd window that looks similar to this👇
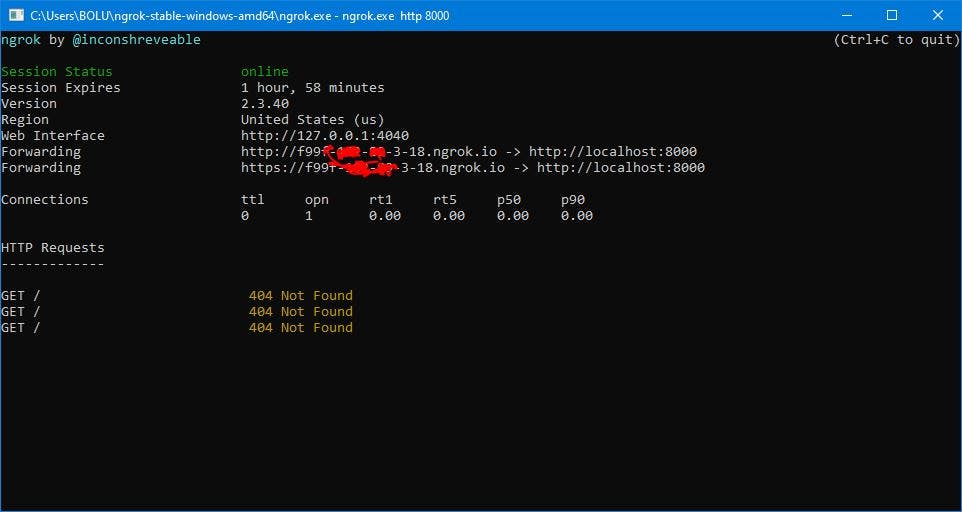 Notice the forwarding part
- Copy the URL in the forwarding part and paste it in your browser.
You should get a screen that looks similar to this👇
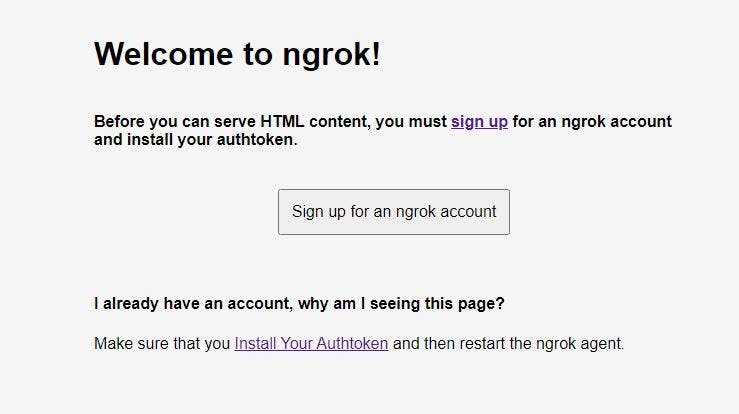
- Click on the sign up link so as to get Authtoken
- After signing up, go to the dashboard and copy your authtoken
ngrok authtoken [YOUR_AUTHTOKEN]: this command creates a hidden configuration file - ngrok.yml file. The next step is to restart the ngrok agent and get a new public url that redirects to your localhost server behind the scene.
Since, python manage.py runserver command only serve the localhost with HTTP protocol, you might run into this error ERR_NGROK_3200 while running the website on HTTPS. The reason why this happens is because by default when ngrok runs an HTTP tunnel, it opens endpoints for both HTTP and HTTPS traffic. In this case, to restrict forwarding to only HTTP traffic you can make use of -band-tls switch. Here is how to use it:
ngrok http -bind-tls=false 8000
You should get a terminal/cmd window that looks similar to this👇
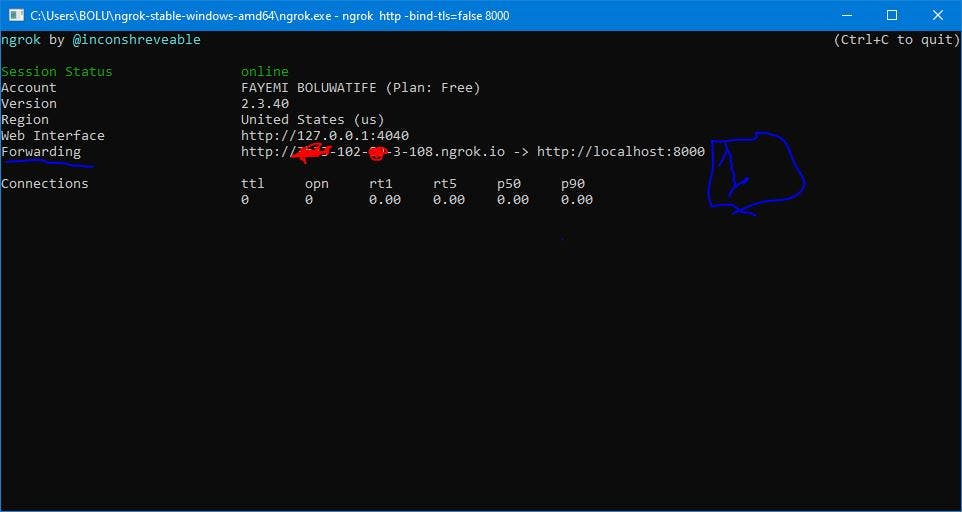 NB: Notice that we now only have one forwarding using the http url protocol.
Copy the URL in the forwarding and share it.
NB: Once you stop ngrok on your local machine or stop the localhost server, the public URL can no longer access your localhost.
Reference
- Ngrok Documentation which can be retrieved here
Final Thoughts
In this article, we explored how to use ngrok to expose local web server to the public internet. Ngrok can do beyond just that. It provides public URLS for:
- testing your chatbot
- building webhook integration
- testing on mobile devices
- SSH access to Raspberry Pi
- sending previews to clients
Thanks for reading up to this point.
Don't forget to like👍, clap👏, comment and share.