How to use PostgreSQL Database in a Django Project
both in development and in production on heroku


Overview
In this article, you are going to learn about how to use PostgreSQL database in a Django project instead of the file-based database - SQlite Django provides by default. The reason why SQlite database cannot be used in a production-ready project on Heroku will also be made known in this article.
Prerequisites
Basic knowledge of Heroku deployment
Basic knowledge of CLI commands
Note: This article uses pipenv for managing Python Packages and virtual environments. You can read more about pipenv here. If you are not using pipenv, you can still follow this article.
PostgreSQL
"PostgreSQL is a powerful, open source object-relational database system with over 30 years of active development that has earned it a strong reputation for reliability, feature robustness, and performance".
Brief features of PostgreSQL are:
supports a wide variety of data types.
provides ACID(Atomicity, Consistency, Isolation, Durability) transactions.
supports partitioning methods.
Why use PostgreSQL database?
When I started learning Django, I deployed a blog website with the default file-based SQlite database. A day or two after deployment, I noticed that the account I created the previous day could not be authenticated.
Did I truly create the account? Yes, I did
Was I sure of the password & username I used? Yes, I mean I saved the login credentials to Chrome
What then could be wrong?
The above were some of the questions I asked myself. But one thing was quite clear, the data (posts, comments, user accounts, and all) stored on the database before deployment were intact. So, I had gotten enough pointers to get to the root of what could be wrong.
While I was researching the issue, I got to know that Heroku uses an Ephemeral File system which means that any changes made to the file system whilst the dyno is running only last until that dyno is shut down or restarted. Each dyno boots with a clean copy of the file system from the most recent deployment.
These two facts mean that the filesystem on Heroku is not suitable for persistent storage of data. Hence, the reason for the disappearance (or deletion) of data or file upload after a while.
The blog website I created with SQlite can be accessed here. Play around with this and you experience what was described above.
Now that the reason why SQlite can't be used in production-ready Django websites has been made known, let's talk about the setting up process for PostgreSQL.
Using PostgreSQl in Development (i.e localhost)
Creating a Django project
open cmd
change to the right directory
create a project directory & change to the directory
create virtual environment
install Django
check if Django has been installed successfully
create a new Django project
Installing Dependencies
After the Django project has been created successfully, you need to install certain applications and a python module.
The applications required for working with the PostgreSQL database are:
PostgreSQL: It can be downloaded here
PgAdmin: pgAdmin is a free open-source graphical management tool for PostgreSQL and derivative relational databases. This can be downloaded here
Note: During the installation of PostgreSQL, you will be prompted to provide a password. You will also be asked for a port number which by default will be 5432, you can leave it that way.
The module needed for python to be able to work PostgreSQL database: psycopg2 It can be installed using this command
pipenv install psycopg2
Creating a new database using pgAdmin
Open the pgAdmin app
Type in the administrator password.
Create a new database
Click on
Server > PostgreSQL 14.You will see a dropdown list.
Right-click on
Databasesand selectCreate > Database.You will see a new window that looks similar to this, type in the name for the database. The comment field is optional.
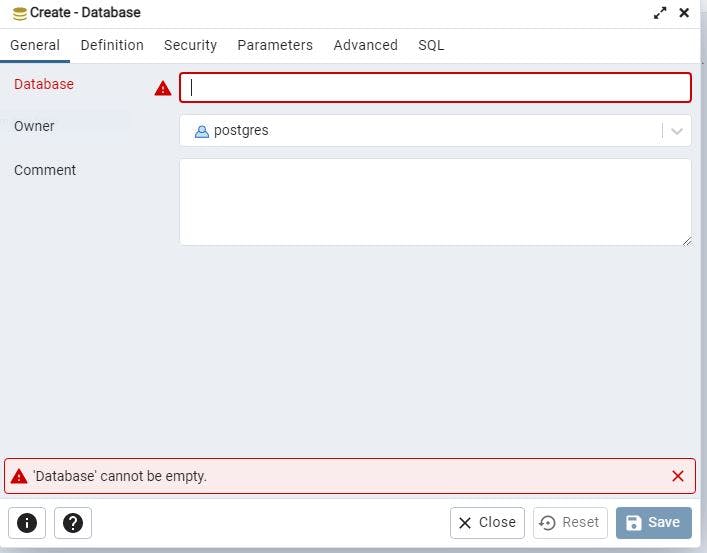
Note: 'book' is used as the database name in this article
Upon successful creation of the new database, the left-hand side pane will look like this 👇
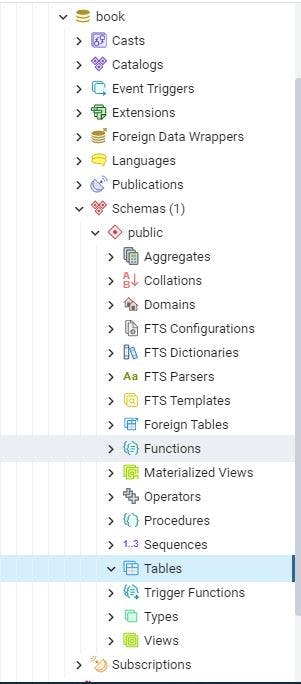
What we are interested in is inside Schemas (1) > Public. As you might have guessed, our main target is the Tables.
If you have a keen eye, you should have noticed that the Tables is empty for now. Okay, how can one infer the Tables is empty? Since the caret beside Tables is in the open state (inverted) compared to the rest of the list and there is no item shown. One can conclude that the Tables is empty. And Yes! Migration has not been applied.
The next step is to change the SQlite to PostgreSQL.
Open
settings.pyGo to
DATABASESvariable and change it using this format.
DATABASES = {
   'default': {
       'ENGINE': 'django.db.backends.postgresql',
       'NAME': '<database_name>',
       'USER': '<database_username>',
       'PASSWORD': '<password>',
       'HOST': '<database_hostname_or_ip>',
       'PORT': '<database_port>',
   }
}
In this article, <database_name> will be book, <database_port> will be 5432, <database_hostname_or_ip> will be localhost.
In case, you do not know the credential to fill in for the database settings.
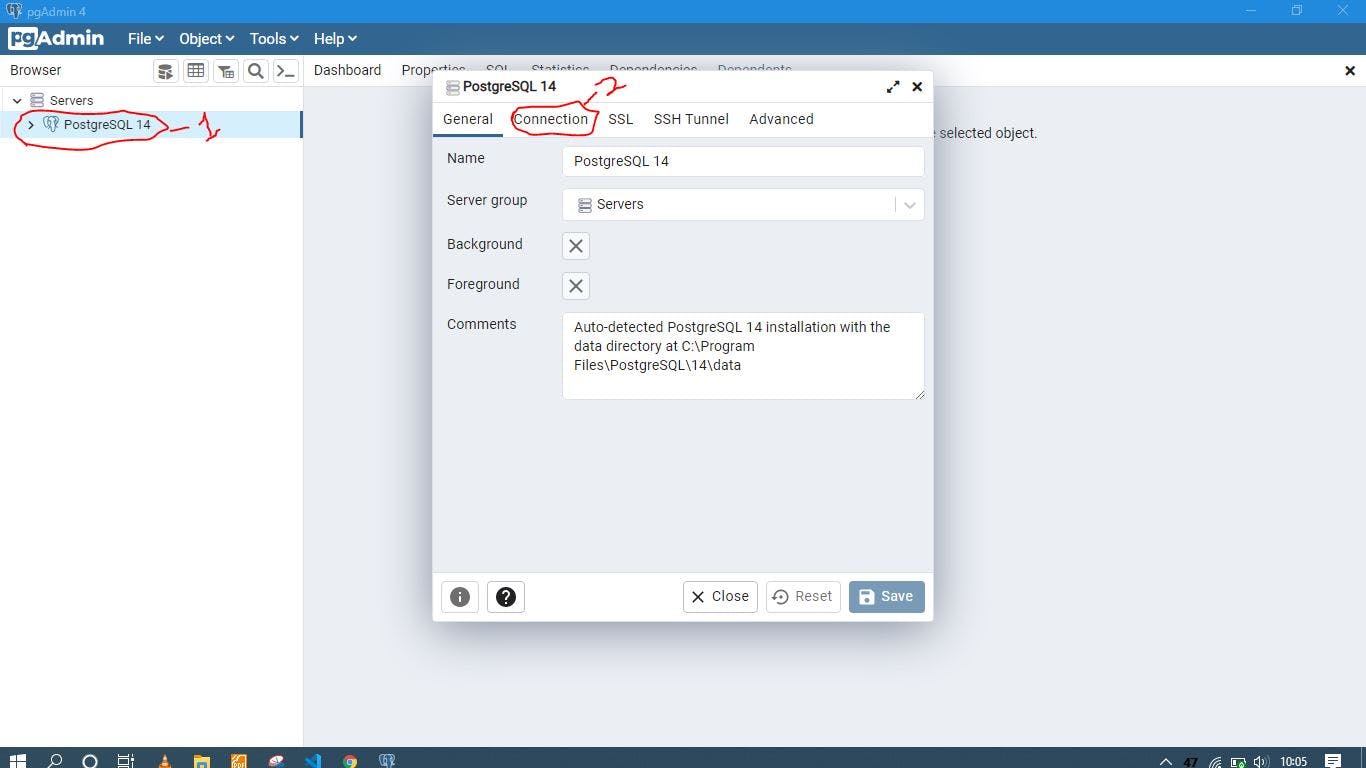
Right click on
PostgreSQL 14on the left hand pane of pgAdmin window then click onPropertiesClick on
ConnectionYou will get a window similar to this one.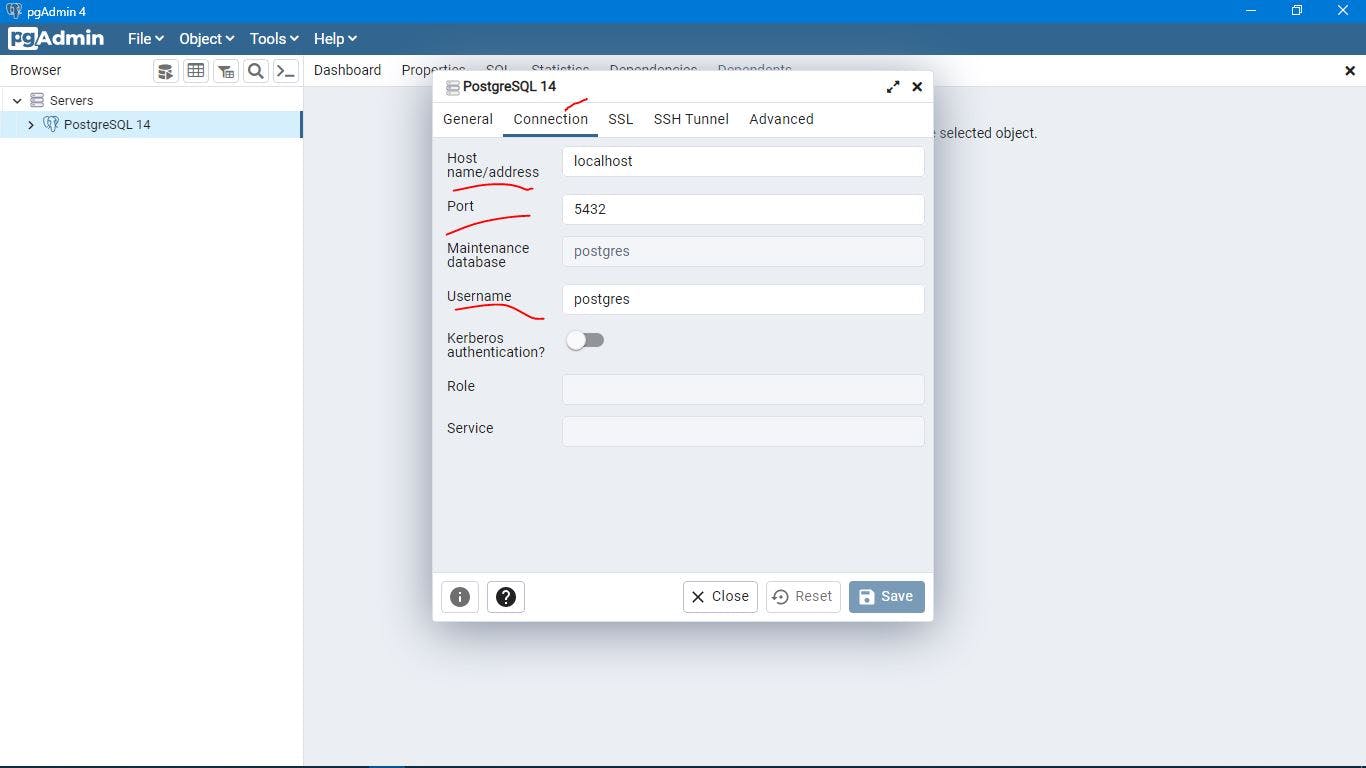
You can see the credentials are shown.
The next thing is to apply migrations so that the default tables that come with django can be created.
python manage.py migrate
Upon successful application of migrations, Tables in the database in Pg admin will no longer be empty.
Note: You might have to refresh the database in order to see the changes.
Using PostgreSQL in Production (on Heroku)
Note: This article does not explain how to deploy a Django project to Heroku. So, basic knowledge of Heroku deployment is required.
Go to your app on Heroku and click on the
Resourcestab.Type 'postgresql' in the add-ons search bar to create a new database.
Click on the newly created database.
Note: The database page will be opened in an external tab.
Click on the
Settingstab and then theView Credentialsbutton to get the database URI.Copy the database URI and then go to your apps on Heroku and click on the
Settingstab.Go to the config vars section and click on
Reveal Config Vars.The database URI should be added as a config var. It might be added automatically but always check to confirm.
In order for Django to access the database on Heroku, we need to install another dependency.
pip install dj-database-url
configure the database setting in the settings.py using this format
DATABASES = {
    'default': {
        'ENGINE': 'django.db.backends.postgresql',
    }
}
import dj_database_url
db_from_env = dj_database_url.config(conn_max_age=600)
DATABASES['default'].update(db_from_env)
Note:
Comment out the previous database setting.
Don't forget to update
dj-database-urlin yourrequirement.txtfile, in case you are not using Pipenv.
Since you just connected to a newly created database you have to apply migrations.
heroku run python manage.py migrate
You have successfully connected PostgreSQL database on Heroku to your website.
I created a church management system (still a work in progress though) using postgreSQL. It can be accessed here. Play around with this as well & you will notice persistent storage of data.
References
Heroku documentation. It can be retrieved here
dj-database-url documentation. It can be retrieved from here
Final Thoughts
The processes required to use postgreSQL database in development and production on Heroku in a Django project were explained in this article. Other powerful databases like MySQL, MariaDB, and Oracle can also be used in a Django project.
Thanks for reading up to this point.
Don't forget to like👍, clap👏, comment, and share.